I haven’t often been given cookbooks to review, but there have been several lately, and the Hello Kitty® Baking Book came right on the heels of my brownie book.
Right off, I bet you are thinking, “Hello Kitty is just for kids,” but this book has a greater appeal to me – the recipes are fantastic. I’m not sure I understand little girls’ fascination with Hello Kitty, but it is genuine, and it turns out to be unexpectedly fun.
Michele Chen Chock has done what many books in this ilk have not done; she has created whimsical confections to appeal to children with flavors and quality that appeal to adults. And, by adults, I mean food snobs. And, by food snobs, I mean me.

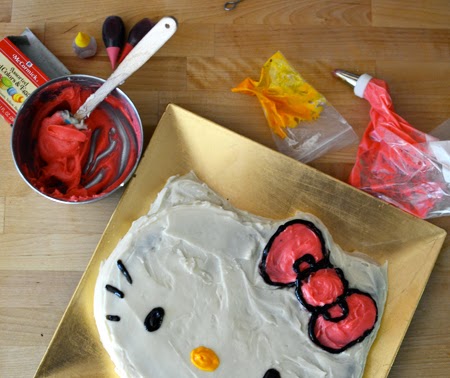
Her “Getting Started” section is very thorough and should be read first. (Mea culpa: I usually skip this and check out all the recipes and pictures first.) It includes a list of ingredients (if you want black or red icing, you will need to use gel-based food coloring – they won’t thin your icing and the colors will be intense), baking equipment (I really do need to invest in a candy thermometer…), and decorating equipment (my favorite tip is to use disposable piping bags. My waxed canvas bag was a disgusting mess after making two Hello Kitty cakes. Jackson Pollock had nothing on me…).
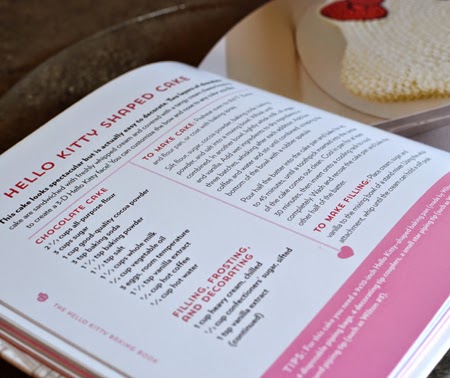
Following all the technical stuff, the real fun starts. The recipes: six cookie recipes (including my favorite – Hello Kitty French Macarons), eight cake and cupcake recipes (I made the Hello Kitty Shaped Cake), and six pies, party treats and more (the cake pops are really cute).
Following the recipes are some really good and practical pictorials on “how to” create all these fun and colorful confections.
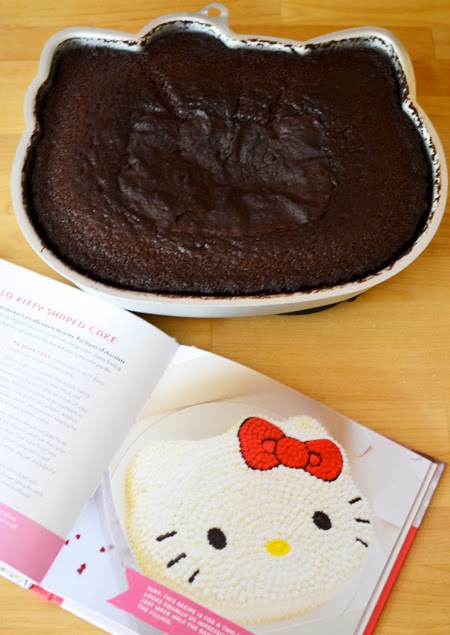
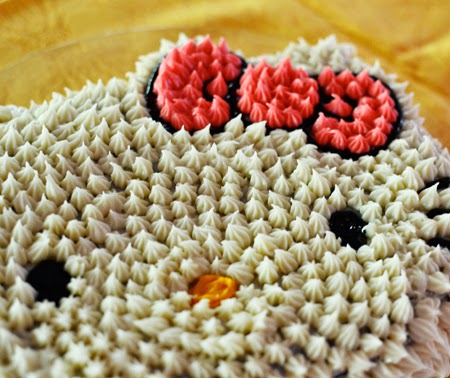
Down to the nitty gritty… as I said, the recipes are good. I got more compliments on this cake than on any other I have made. Rich, but not too sweet (both the cake and the icing), incredibly moist, and perfect for kids and adults alike. This one adds coffee to the chocolate: I recommend a good decaf if feeding this to young ones. Sugared up and highly caffeinated children can be … well … um … er … you finish the sentence.
I had a bit of a tough time with the icing. It worked in the end, but my piping skills were not anywhere near Michele’s. The icing was thinner than I expected, and needed to be chilled before piping, and then re-chilled a couple of times during my protracted piping session. It came out well, but was in no way a work of art.
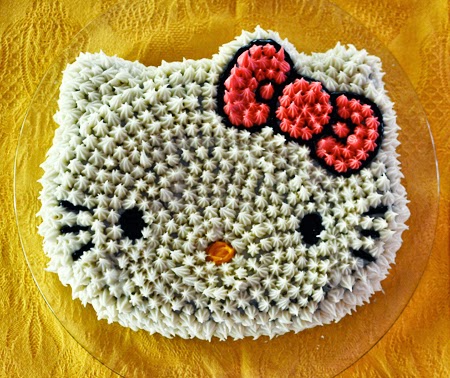
This particular recipe makes two cakes. Michele suggests creating a single two-layer cake with a filling. I know two families with young children, so I created two single-layer cakes and skipped the filling. I had to double the icing to cover two cakes, and when I gifted them, it made two households with young girls very happy. As you can see from the photos, I followed the book and piped 45 billion stars on one cake, and iced the other in a more standard manner. In a way, I think this provides a less intimidating version for people without piping bags or skills (my star skills are not stellar, as you can see…).
Author Michele Chen Chock, a Hello Kitty superfan, is the creator of the I Heart Baking! blog. Her work has appeared online in such publications as Glamour, Wedding Bells, and Huffington Post. The Hello Kitty Baking Book is published by Quirk Press and is now available for $14.95. It is also the first-ever licensed Sanrio cookbook. (Sanrio is the creator of Hello Kitty.)
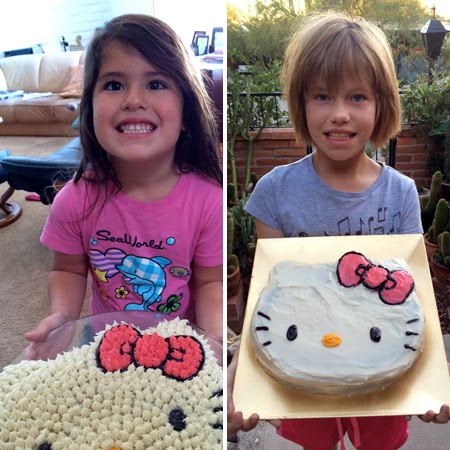 |
| Two very happy kitties! |
At this point, all that is left to say is, “Hello Kitty! Welcome to my kitchen!”
~ David
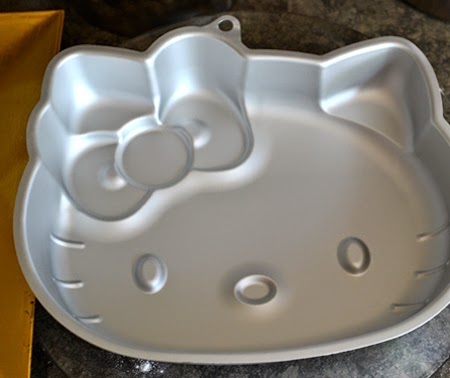
Hello Kitty Shaped Cake(s)
(To make this cake, I did purchase a very inexpensive baking pan by Wilton.)
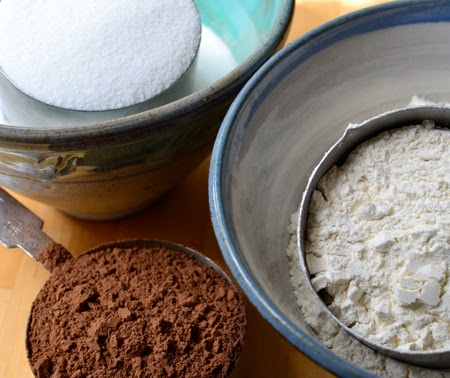
For the Chocolate Cake2 1/2 cups all-purpose flour
3 cups sugar
1 cup good-quality cocoa powder (unsweetened)
3 teaspoons baking soda
1 1/2 teaspoons baking powder
1 1/2 teaspoons salt
1 1/2 cups whole milk
3/4 cup vegetable oil
3 eggs, room temperature
1 1/2 teaspoons vanilla extract
3/4 cup hot coffee
3/4 cup hot water
For the Icing (this recipe makes enough to ice two single-layer cakes)
2 8-ounce packages (2 cups) cream cheese, room temperature
1/2 cup (1 stick) unsalted butter
6 cups confectioners sugar, sifted
pinch salt
2 teaspoons vanilla extract
gel-based food coloring (pink, yellow, black)
To make cake: Preheat oven to 350°F. Butter and flour pan, or coat with baking spray.
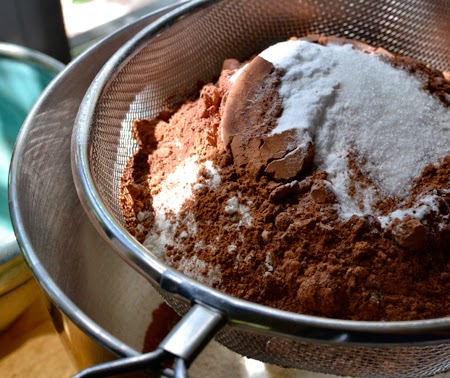
Sift flour, sugar, cocoa, baking soda, baking powder, and salt into a large mixing bowl. Whisk until combined. In another bowl, lightly whisk milk, oil, eggs, and vanilla. Add wet ingredients to dry ingredients in three batches, whisking after each addition. Add hot coffee and water and stir until combined, scraping the bottom of the bowl with a rubber spatula.
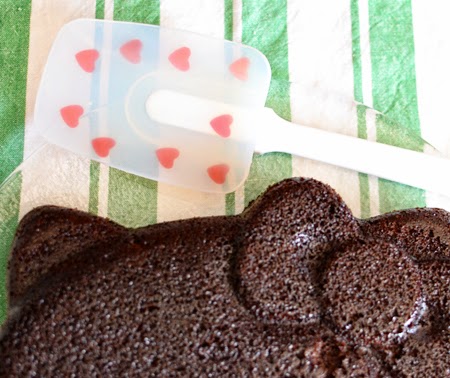
Pour half the batter into the prepared cake pan and bake for 40 to 45 minutes, until a toothpick inserted into the center of the cake comes out clean. Cool in pan for at least 30 minutes, then invert onto a cooling rack to cool completely. Wash and recoat the cake pan, and bake the other half of the batter.
While the second cake is baking, make the icing.
Using a stand mixer fitted with the paddle attachment, whip cream cheese and butter until creamy. Add sugar, salt, and vanilla and beat until fluffy. Use immediately, or cover the bowl with plastic wrap and refrigerate, mixing briefly before using.
To Decorate: Divide icing into four bowls. Tint 1/2 cup black for the eyes, whiskers, and bow outlines. Tint 1 cup pink for the bows. Tint 1 tablespoon yellow for the noses. (Michele recommends 1/4 cup for the nose, but that is really overkill.) The rest will remain white. Fill 4 disposable piping bags with the 4 colors. (You will not want all the white in the bag – keep some in the bowl. You will use it for the crumb coat and it makes piping easier when the bag isn’t too big.)
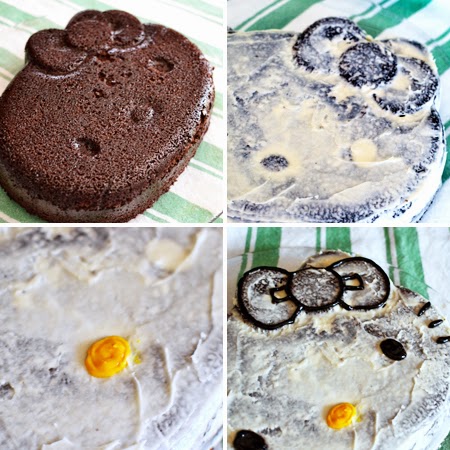
Spread each cake layer with a light coating of the white frosting. This is the crumb coat, which will make icing much easier for the second cake. It will also fill in any dents or pockmarks if parts if the cake stuck to the pan. This coat should be thin enough that you can see the design indentations of the cake.
Cake No. 1: Using the black icing, and a small round tip, pipe the outline of the Hello Kitty’s eyes, bow, and whiskers. Fill in the eyes with the black frosting.
Using the same small round tip (cleaned), pipe the outline of the nose with yellow icing, and finish by filling in the nose.
Change to a clean star tip and, using the pink icing, pipe pink stars in the black-outlined bow. (If you have never piped a star, get ready for some back exercise!) Holding the bag at a 90° angle to the surface, touch the tip to the cake surface, squeeze gently, stop when you see a star, then quickly pull up. I recommend testing this on paper or cardboard first. I wish I had done that!
Clean the star tip and then, using it with the piping bag filled with white icing, begin piping white stars in concentric circles around Hello Kitty’s nose. I stopped as I got to the edges, and then did the vertical sides separately.
My advice: • Be patient. • Don’t rush. • Keep the bag perpendicular to the surface. • Don’t pipe too much icing out. • Keep your stars close to one another. • Chill your icing a bit if it begins to look too glossy.
Cake No. 2: For the other cake, after the crumb coat, decorate in the opposite order of Cake No. 1. Start by covering the cake completely up to, but not including the bow area, with a thick and smooth coating of white icing. Make sure to give the ears their 3D nature by showing the upper edge.
Then, using a medium round tip and the pink icing, pipe the outline of the bow, then continue to fill in the bow area, either by piping it in, or using a spatula.
Using the small round tip and the black icing, outline the bow sections, and create eyes and whiskers on top of the icing. Use the empty cake pan as a guide for placement.
Finally, using a clean small round tip and the yellow icing, outline and fill in an oval for her nose.
Voilà – two different (but equal) Hello Kitty cakes! Together, these will easily feed 30!

Developed and maintained by Inspiratech LLC.
Design by Themeshift.


ahu @ ahueats
October 18, 2014 at 2:26 pmAdorable cakes, and how sweet that you got to make not one but two little girls happy! 🙂
Cocoa & Lavender
October 19, 2014 at 3:18 pmIt was great fun, Ahu!
Cathleen | My Culinary Mission
October 18, 2014 at 3:09 pmHow fun, David! Lucky, lucky girls! And I think your piping skills are just fine. The last pic looks like a furry kitty. This brings back fond memories of the cakes I used to make our now grown daughter. Which by the way, she will be here today for a bday celebration. No kitty cake this time – an apple cake and cinnamon ice cream today. Have a delightful weekend!
Cocoa & Lavender
October 19, 2014 at 3:20 pmCathleen – you should do a post on all the cakes you made for her! Ad I bet if you revived one for her next birthday, she would be charmed by it! Love the sounds of the apple cake with cinnamon ice cream.
Cathleen | My Culinary Mission
October 20, 2014 at 4:32 pmGreat idea David! Sounds perfect for her 25th! And I did do a post last year after seeing another bloggers beautiful cakes – got all nostalgic. 🙂
http://myculinarymission.blogspot.com/2013/08/cakes-short-jaunt-down-memory-lane.html
Cocoa & Lavender
October 20, 2014 at 11:59 pmOh, thank you for sharing those! Love them! I think a reprise of the Wizard of Oz is definitely necessary. 🙂
Andrea_TheKitchenLioness
October 19, 2014 at 6:54 amDavid, I am still smiling about that book…Hello Kitty Cakes would certainly make our girls very happy and I do own that baking pan (but I think that it is smaller than yours) – so, I shall certainly give this lovely cake a try soon (but that piping…I am not really good at that I must admit) – I love that you made two little girls very happy with your lovely cakes, dear friend! What a fun book review!
Wir wünschen euch einen schönen Sonntag und ganz viele liebe Grüsse aus Bonn,
Andrea
Cocoa & Lavender
October 19, 2014 at 3:27 pmAndrea – the cake pan turned out to be larger than I thought. I hope you get a chance to make this – the girls (and Thomas) will love it!
john | heneedsfood
October 19, 2014 at 7:42 amYour piping skills are actually quite good, David, and this is surely one cake that'll satisfy the kawaii in all of us! (insert Japanese schoolgirl giggle here)
Cocoa & Lavender
October 19, 2014 at 3:32 pmThanks, John – Real Simple posted the exact same cake on Instagram yesterday and I have to say mine is better. I feel I have a lot to learn about piping frosting, but it won't too bad. Okay, I had to look up kawaii emoticons – I had no idea what they were! Now I do… (^•^) – look want you have done! (insert responsive Japanese schoolgirl giggle here)
Lizzy (Good Things)
October 19, 2014 at 7:55 amLordy, what fun!
Cocoa & Lavender
October 19, 2014 at 3:33 pmYep, Liz – it was a lot of fun AND the cake tasted great!
Cheri Savory Spoon
October 19, 2014 at 5:52 pmHi David, had no idea you have such great cake decorating skills. So adorable!
Cocoa & Lavender
October 19, 2014 at 7:30 pmCheri – you are so kind! This was my first time piping stars for a cake! Once when I was supposed to make a Barbie cake, I saw all the piping that was required for her dress and ended up using marzipan instead so she had a flowing cream-colored gown with fantastic folds. I decorated the "fabric" with silver dragées. Sometime I will share that photo on C&L!
Anonymous
October 19, 2014 at 6:03 pmI just want to say thank you for responding to each and every comment! That is so nice of you.
I agree with what you said about making "cute" confections but making them with delicious ingredients. I have always said this about Christmas cookies, for example. "There are two kinds of cookies, the cute ones and the ones that taste good."
Looks like it was so much fun to make two darling little girls smile! Those cakes were perfect.
Cocoa & Lavender
October 19, 2014 at 7:32 pmHi Caterina – I love responding to comments – it really does give me a sense of community I can't get elsewhere. So nice of you to say that!
I agree with you – when I see beauitful Christmas cookies and then they taste like cardboard, I get so annoyed. I'd rather a plain butter cookie than some fantastic creation that is bland!
Anonymous
October 20, 2014 at 8:37 amI am with you on the disposable piping bags I can't live without them! I think your piping skills were great and you made two little girls very happy.
Cocoa & Lavender
October 20, 2014 at 3:05 pmComing form you, Karen, that is an incredible compliment! I actually thought of you when I was piping stars (sloppy ones, at that) hoping you mightn't see this post! 🙂 The two girls' faces made it all worthwhile.
Anonymous
October 20, 2014 at 11:44 pmLOL I may have been slow to comment lately but I always read your posts – nothing escapes the eagle eye of the LGC diaries :). You did an excellent job!
Cocoa & Lavender
October 21, 2014 at 12:00 amThanks. I know you are there – just nervous in front of a pro… 🙂
Unknown
October 21, 2014 at 12:28 amLike I've said many times, you are a sweetheart! What gorgeous cakes to make two little girls happy. I think you did a fantastic job icing and decorating and they both look fab. I've done that while little stars lark when I was first starting out in decorating cakes. I made a Superman one for my hubby, my arm almost fell off.
As a young girl, I LOVED Hello Kitty and bought all the pencils and little girlie things. My girls didn't like get as much as I did. Did you hear that she's sctually supposed to be a little English girl and not a cat? 🙂 I was confused too.
Cocoa & Lavender
October 21, 2014 at 2:16 pmThat is too funny, Nazneen – I had no idea it was mean to be a little English girl! Thanks for your nice comment about my decorating skills – I can pretty much say that I doubt this will be something I do often. I know exactly what you mean about feeling as though your arm will fall off!
Colette (Coco)
October 21, 2014 at 6:04 amD, you always manage to surprise me with something. I didn't realize you were such a fantastic baker. Those cakes are just so pretty!
Did I mention my bday is coming up? 😉 xo
Cocoa & Lavender
October 21, 2014 at 2:17 pmWell, happy birthday dear Colette! If you lived here, I would bake something for you! 🙂 Thanks for your nice comment! xo
Provence WineZine
October 21, 2014 at 10:11 pmBeautiful cakes! After I read this post, it seemed that I saw "Hello Kitty" things everywhere….but none as pretty as those cakes! The recipe looks very good, too!
Cocoa & Lavender
October 25, 2014 at 4:18 amHello Kitty is, indeed, everywhere! Her popularity has never waned. xo
michele @ i-heart-baking
October 24, 2014 at 11:55 pmthanks for the awesome review! your cakes turned out beautiful! 🙂
Cocoa & Lavender
October 25, 2014 at 4:19 amThank YOU for an awesome book, Michele! I am honored by your compliment, especially as it was my first piping job!